

When a snack brand changes its bag from full-metallized to wash-aluminum, sales typically jump — the consumer can see the product, not just a shiny wrapper. That’s the core advantage: selective transparency. Metallic brilliance where you want shelf impact, a crystal-clear window where the product needs to sell itself.
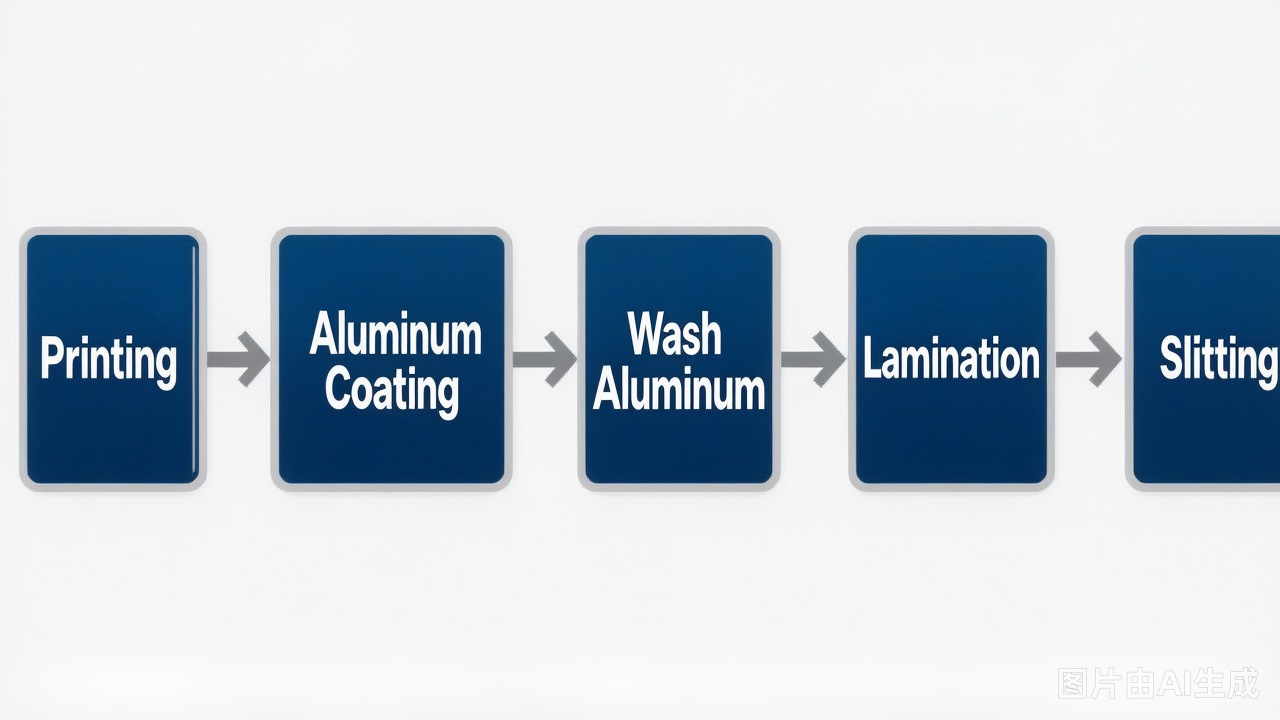
I’ve walked enough production floors to know this material is tricky. The wash-aluminum process — printing, vacuum metallizing, selective aluminum removal, lamination, and slitting — is a five-step chain where one weak link ruins the entire roll. Here’s what actually matters at each stage.
Process Flow Diagram
1. Printing
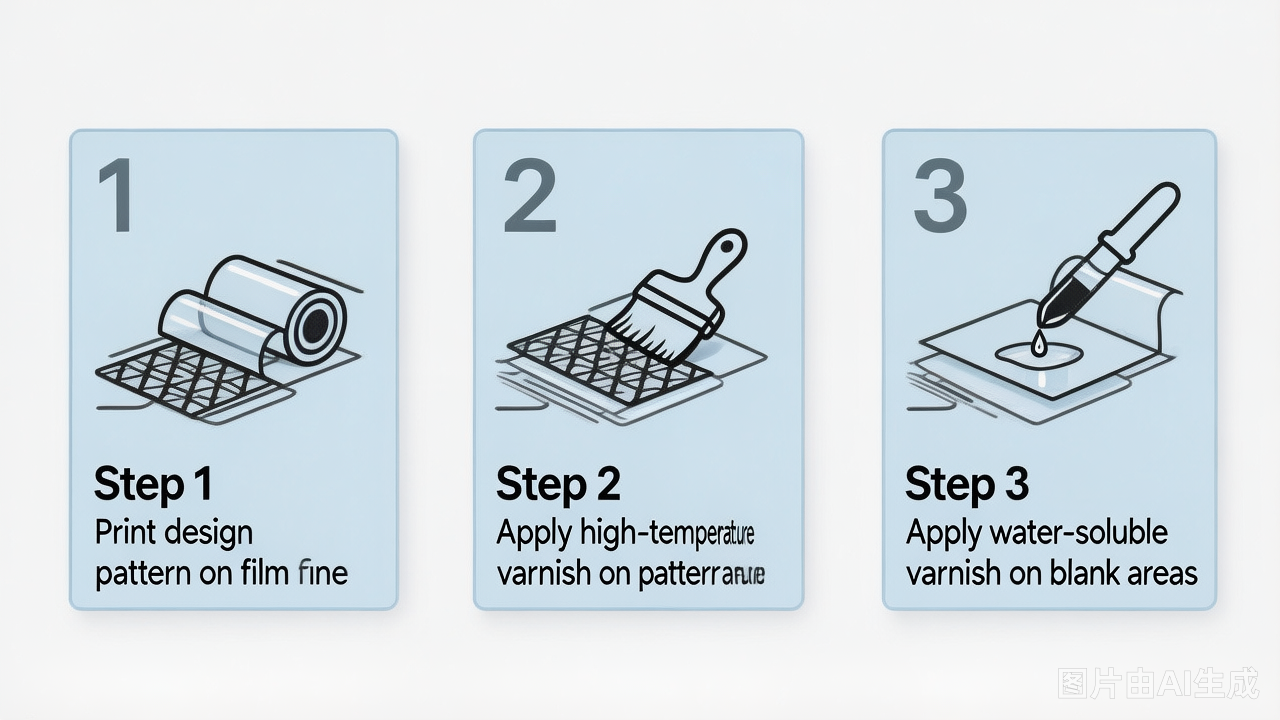
The printing stage sets the foundation. Everything starts with rotogravure printing on BOPP film in a controlled environment (20-30°C). After the color ink layers go down, two more coatings follow: a high-temperature varnish over the printed areas, and a water-soluble varnish over the blank areas.
This is where registration becomes non-negotiable. For primary solid print areas, keep the registration error at ≤0.2 mm. Secondary areas can tolerate ≤0.4 mm. A high-precision computer registration system helps, but the operator’s eye still matters — especially when switching between jobs with different ink viscosities. Process control parameters align with ISO 12647-4 guidelines for gravure printing consistency.
Recommended parameters from the shop floor:
| Parameter | Setting |
|---|---|
| Registration system | Computer-controlled, high-precision |
| Halftone drying temperature | 55-60°C |
| Full-coverage print drying | 70-85°C |
| Intake/exhaust air pressure | 80-90 mmHg |
| Line speed | 150-180 m/min |
2. Aluminum Coating (Vacuum Metallization)
The printed BOPP film goes into a vacuum chamber. Pressure drops to 10-4 to 10-5 Torr — at that level, aluminum wire melts and vaporizes, then condenses onto the film surface through physical vapor deposition (PVD). The result is a uniform metallic layer bonded to whatever coating sits underneath.
The high-temperature varnish from Step 1 earns its name here. Without it, the heat of vapor deposition cooks the ink layer underneath. I’ve seen what happens when someone skimps on varnish quality: the aluminum adheres to damaged ink, and you get patchy, inconsistent metallization that no amount of downstream adjustment can fix.
3. Wash-Aluminum (Selective Removal)
This is what makes wash-aluminum different from standard metallized film. The printed, metallized film passes through a wash station. Water hits the water-soluble varnish zones, dissolving them. The aluminum sitting on top of those zones — now with nothing holding it — peels off.
A few things make the difference between a clean wash and a mess:
- Friction matters. The wash roller should be wrapped with a high-friction cotton cloth. It mechanically helps strip loose aluminum from the film.
- Water management. A two-tank system works well: one wash tank, one settling tank. Aluminum particles sink by density difference, and recirculated water from the settling tank keeps consumption reasonable.
- Drying after wash. A forced hot-air convection system removes residual moisture before the film is re-wound. Any water left on the surface creates adhesion problems during lamination.
After washing, the film shows two distinct zones: bright metallic areas where aluminum remains (protected by the high-temperature varnish), and completely transparent windows where the water-soluble varnish was washed away.
4. Lamination
A typical wash-aluminum composite structure is BOPP / PET / CPP. Each layer pulls its weight: BOPP carries the print, PET adds stiffness and heat-seal strength, and CPP provides the sealant layer. Multi-layer lamination like this is standard practice across the flexible packaging industry, where the Flexible Packaging Association (FPA) tracks material and process trends across thousands of converter operations.
First lamination pass (BOPP to PET):
| Parameter | Setting |
|---|---|
| Adhesive concentration | 17-20s (Zahn Cup #3) |
| Drying temperatures | 55°C / 65°C / 75°C |
| Line speed | 90 m/min |
Second lamination pass (to CPP):
| Parameter | Setting |
|---|---|
| Adhesive concentration | 16-20s (Zahn Cup #3) |
| Drying temperatures | 60°C / 70°C / 80°C |
| Line speed | 100 m/min |
Across both passes, you can’t afford the usual lamination defects: no fisheyes, no streak lines, no bubbles, no wrinkles, no visible adhesive patterns.
Use a modified high-clarity CPP for the sealant layer — standard CPP clouds up and kills the transparency of the wash windows.
5. Slitting
The finished laminate gets slit to customer-specified widths and roll lengths. End-face flatness must stay within 2 mm. Registration position must not drift from roll to roll. Splices need to lay flat and match the print repeat exactly so downstream automatic packaging machines don’t jam.
Material Selection: The Two Varnishes
If you’re developing a wash-aluminum product, the varnishes make or break it.
High-Temperature Varnish
This sits on top of the ink in printed areas and directly receives the aluminum vapor. Three non-negotiable requirements:
- Zero reaction with ink. It cannot dissolve or attack the ink layer beneath it.
- Genuine heat resistance. The vacuum metallization chamber gets hot. The varnish must protect the ink throughout the entire deposition cycle.
- Dual adhesion. Strong bond to the ink below AND strong bond to the aluminum above. If either interface fails, the metallic appearance degrades after washing.
Water-Soluble Varnish
This coats the blank (unprinted) areas and gets washed away later. It needs to:
- Form a dense, pinhole-free film on the substrate. Any uncovered spots become aluminum that won’t wash off.
- Dissolve quickly and completely in water. Slow dissolution means residual aluminum specks.
- Level well during application for uniform coverage.
Cylinder engraving specs for varnish application: The cell depth and line count on the gravure cylinder are critical paired parameters. Too shallow, and you starve the surface — not enough varnish to shield the ink during metallization. Too deep, and costs climb while coating uniformity suffers.
Critical Process Controls
Even with the right materials, production quality hinges on a few control points that separate good runs from expensive scrap:
1. Registration Precision
With three layers on the same print cylinder — color ink, high-temperature varnish, and water-soluble varnish — registration monitoring needs to cover all three. A drift in the varnish plates means aluminum ends up in transparent zones or, worse, blank spots in the metallic areas.
2. High-Temperature Varnish Quality
- Mixing ratio. Get the solvent ratio wrong, and ink pickup suffers. The aluminum then bonds to damaged ink and ruins the print.
- Pot life. Mix only after print approval. Letting catalyzed varnish sit unused leads to premature curing.
- Filtration. Run the varnish through a filter before loading the ink pan. Unfiltered varnish particles cause doctor blade streaks — a classic problem that operators chase for hours before checking the obvious.
3. Water-Soluble Varnish Control
- Coverage gaps. Any thin spot lets aluminum penetrate to the substrate during metallization. Those spots won’t wash out.
- Drying. Print the varnish as-supplied without thinning when possible. Over-dilution creates drying problems.
- Filtration. Same rule as the high-temp varnish — filter before use to prevent blade streaks and haze.
4. Residual Solvent
Excess retained solvent in the printed film degrades vacuum levels during metallization. Poor vacuum means poor aluminum adhesion. If the metallizer operator reports slow pump-down times, look upstream at the printer’s drying settings.
5. Printing Rollers
- Use fresh rubber rollers for varnish application. Worn rollers deliver uneven coating thickness.
- Inspect transfer (ductor) rollers regularly. Uneven ink transfer at this stage compounds through every downstream step.
6. Doctor Blades
Switch to ceramic doctor blades. Standard steel blades wear faster under the abrasive varnish formulations, and worn blades produce those fine streak lines that show up most clearly in the transparent wash windows.
Conclusion
Wash-aluminum composite packaging delivers what standard metallized film can’t: brilliant metallic graphics next to transparent product windows, all in one structure. Premium FMCG brands keep adopting it because it moves product off the shelf. When used for food-contact applications, the full laminate structure must comply with FDA food contact substance regulations for migration limits and material safety.
The process demands attention to detail — varnish selection, registration control, solvent management, and blade maintenance all interact. But when the controls are dialed in, the result is a differentiated packaging format with genuine shelf impact.
Originally published in Guangdong Packaging magazine, Issue 03/2013. Author: Li Zhenxing, Huangshan Novel Co., Ltd.
References
- Wikipedia: Rotogravure — Overview of the gravure printing process, cylinder engraving, and industrial applications in flexible packaging.
- Wikipedia: Physical Vapor Deposition — Fundamentals of vacuum deposition technology including thermal evaporation used in film metallization.
- ISO 12647-4:2014 — Graphic Technology — Process Control for Gravure Printing — International standard for color separation, proofing, and production print consistency in gravure.
- Flexible Packaging Association (FPA) — U.S. industry association providing technical resources, market data, and best practices for flexible packaging converters.
- FDA: Food Contact Substances (FCS) — U.S. regulatory framework for materials intended to contact food, including laminated film structures and coatings.